Who Were
The Cambs
The Cambs
at War
1/1st Btn 1914-1919
1914 - 1/1st Overview
1915 - 1/1st Overview
1915 - St Eloi
1915 - Fosse Wood
1916 - 1/1st Overview
1916 - The Schwaben
1916 - St Pierre Divion
1917 - 1/1st Overview
1917 - St Julien
Insignia, Medals & Books
Remembering The Cambs
Biographies
About Us &
This Site
St Pierre Divion - 13-14 November 1916
There are several periods of the War when those officers who kept detailed records of events were not with the Battalion, and November 1916 is one of these. Therefore there are very limited accounts of the Cambridgeshires at St. Pierre Divion for historians, researchers and descendants to study to gain a better understanding of what occurred and those that do exist differ, making it even harder to provide a definitive account.
In the previous month, alongside comrades from 118th Infantry Brigade, the 1/1st Battalion had captured the Schwaben Redoubt, a commanding enemy stronghold of networked trenches occupying the higher ground north of Thiepval. Losses were fairly high, with over 200 casualties, but disproportionately so among the officers, who had led the assault from the front. Colonel Riddell, who co-authored the Regimental History, was among the wounded and Major Clayton, the other main chronicler was back in the UK, so for November the official account is provided by Major T. Murray, of the Black Watch, who was in temporary command of the Battalion, and whose report is somewhat limited in detail, and the Divisional account, which is fairly detailed, but covers the whole division.
St Pierre Divion lies to the north-northwest of the Schwaben Redoubt, just on the Ancre River and was the obvious next objective after capturing the Redoubt itself. The river snakes its way through the valley acting as a natural obstacle and unsurprisingly the bridges are of immense strategic importance.
As already stated, the Battalion strength had been depleted by the battle in October and in early November this was compounded when the Cambridgeshires were tasked to relieve the unit occupying the north face of the Redoubt, which overlooked the Ancre Valley. This relief took place on 8 November and was, regrettably, observed by the enemy, who then shelled these front line positions. During their 48 hours in the line the Battalion suffered a further 2 men killed and 33 wounded, some of whom would later die of their wounds. So, when orders were received confirming that the Cambridgeshire’s next objective, as part of 39th Division, would be St. Pierre Divion, in a few days’ time, they only had six company officers available and would rely on seasoned NCOs to provide leadership during the coming battle.
Alongside the Cambridgeshires would be the rest of 39th Division with 118th Infantry Brigade providing the fighting element which comprised: 1/6th Cheshire Regiment, 4/5th Black Watch, 1/1st Hertfordshire Regiment, 118th Machine Gun Corps and 118th Trench Mortar Battalion, all units which had fought together over the last few months and knew each other well.
The intelligence gathering, reconnoitring and assembly preparation for the Cambridgeshires was undertaken by 2nd Lieutenant Wrixon and a team of four snipers. The assembly of a large body of troops prior to a battalion attack is complex and, on the Western Front, a dangerous time for all involved but when done well can influence the action itself. The Cambridgeshire’s assembly started on the night of the 12th, at midnight in Thiepval and proceeded via Martin’s Lane to the last assembly point on the north face the Schwaben Redoubt by 3am on the 13th, looking downhill towards St Pierre Divion. This was almost the same location where they had provided the relief a few days before. Despite continuous enemy shelling there were no casualties, which Murray directly attributed to Wrixon and his mens’ efforts, and this diligence sends the Battalion into battle with all the correct personnel in all the correct positions. The diary notes the disposition was as “8 lines of ½ Coys at 20yds distance, the platoons of each ½ Coy filing to the right and left as they reached the centre of their line of assembly”.
Weather conditions were not ideal, there was a heavy mist which made it very dark but the Cambridgeshires started their advance as soon as the barrage opened at 0545. The Brigade had three main objectives: to capture the line of the River Ancre and the crossings at the Mill and Bridge Road. In order to achieve this various entrenched positions would also need to be captured along the way. There would be artillery and Tank support. The Cambridgeshire’s line of advance was to the right of the attack bombing and fighting down Hansa Line to the Hansa Road, and on to the river.
The first or Main Bridge is at map reference Q.18.b.8.3 about 350 beyond, ie. north west of Hansa Road, and is described as a stone bridge for use by all types of transport. The second at the Mill at map reference R.13.a.2.7, also about 350 metres beyond Hansa Road, and about 300 metres north east of the main bridge, is described also as a stone bridge for use by light horse transport. There were three other bridges within the target section of the river but all were wooden footbridges so the capture of the Main Bridge and the Mill Bridge were considered paramount.
These objectives were expected to be well defended by machine gun posts but there was a feeling by Murray that the effectiveness of these posts might be reduced if the Brigades attacking to either side captured their objectives on time. As stated detail is limited but we know that for the assembly great care was taken to muffle the equipment and the men were warned to be absolutely quiet whilst in the assembly position with the result that the enemy were taken completely by surprise when the attack commenced.
At 0715, ninety minutes after zero, the Officer Commanding D Company, Captain C.L. Awbery, reports that having fought his way along Hansa Trench he is now holding the Hansa Road, between map reference R13.c.1.3 and R13.b.0.3; a distance of approximately 600 metres. The Cambridgeshires then push on forward and capture the Main Bridge and the Mill Bridge, notifying Divisional HQ of this at 1100.
The report made by Murray in the Battalion War Diary suggests that the enemy defending the Main Bridge and Mill Bridge vacated these positions allowing the Cambridgeshires to capture them both, seemingly unopposed, but contemporary letters and gallantry medal citations, in addition to the bridge’s strategic importance would suggest this wasn’t altogether the case.
The Main Bridge, at Q.18.b.8.3, was captured by a platoon led by Sergeant Bert Death, and the action was subsequently described in a letter by Private A.E. Williams:
It may interest your readers to know that a hero of the war will soon be with you in the person of Company Sergeant Major J.B. Death, who is having a short leave before proceeding once again to the front. He is a native of Whittlesea, living at 12 Ramsey Road, and won the Distinguished Conduct Medal on the Somme at Beaumont Hamel during the severe fighting in November 1916, just a year ago. His plucky action consisted of taking a company of 36 men ‘over the top’ without officers (he was a Sgt at the time), in broad daylight, at 7am and taking and holding a bridgehead. Unfortunately only 6 of the company survived the ordeal.
This action enabled substantial progress to be made by the bridge. His orders had been to take and hold the bridge at all costs, and this was done, the cost being 30 men and the Sgt wounded. The men in his regiment (The Cambridgeshires) look upon the Sergeant Major as a brave leader and a kind and considerate commander.
Sgt Death had already been decorated for his bravery in action back in 1915 as a Corporal when his company came under very heavy shelf fire at Fosse Wood. He had rallied round, helped the officers organise the situation and rescued the wounded and was Mentioned in Despatches. For his gallantry at St Pierre Divion and also on a night time raid that took place in September during which his officer was killed, he was awarded the Distinguished Conduct Medal; his citation in the London Gazette reads:
For conspicuous gallantry in action. He carried out a dangerous reconnaissance, and later, led his platoon forward with great courage and determination.
The last objective: the Mill Bridge at R.13.a.2.7 was thought to be covered by MG posts which could sweep the road and provide deadly defence. Murray’s suggestion that these posts would be vacated could have been true, but again medal citations suggest otherwise. Private Herbert Q. Howard was awarded the Distinguished Conduct Medals for his part in the capture of the Mill. The citation clearly contradicts the suggestion that these posts were vacated and instead points to individual personal bravery and bayonet charges:
For conspicuous gallantry in action. With a few men he rushed an enemy machine gun, captured the gun and several prisoners. He set a fine example of coolness and courage.
With both bridges and a kilometre of the Ancre River in Allied hands by 11.30 on the 13th the battle had been a success, and now the men set about digging new trenches and consolidating their positions in anticipation of the expected counter attacks – but none came, and the Cambridgeshires held the positions until relived at 0300 on the 15th. The Regiment was responsible for the capture of two of the three Brigade main objectives and were well decorated for their efforts. In addition to the two DCMs detailed above the 1/1st Battalion, Cambridgeshire Regiment also received a Distinguished Service Order for Major Murray:
For conspicuous gallantry in action. He showed great skill and resource in handling his battalion over a very extended front and over a very difficult country. He seized all his objectives, took many prisoners, and eventually consolidated the position won.
Three awards of the Military Cross, first to Captain Awbery who secured the Hansa Road, one to CSM James Coe, and one to 2nd Lieutenant Wrixon who so ably organised the assembly and reconnaissance for the battalion:
For conspicuous gallantry in action. He rendered most valuable assistance in getting the men in their assembly positions. Later, he went forward to ascertain the situation and obtained invaluable information.
A further five awards of the Distinguished Conduct Medal and fifteen Military Medals were awarded for the action. Regrettably only very limited information exists about the Military Medal awards but we do know that they were awarded for a variety of things such as capturing prisoners, clearing dugouts, assisting casualties, running signals under fire and, given the reduced number of officers present that day, for exemplary leadership. Indeed, many of those other ranks rewarded that day went on to commission later in the war such as Private H.Q. Howard DCM and Private C. Vale MM.
Thanks in part to 2ndLt Wrixon and his fastidious preparation, resulting in the enemy being completely taken by surprise, the casualties were comparatively light; 13 men were killed in action or died of wounds and 54 men were wounded. After their relief the Cambridgeshires left the Somme and were moved to the Poperinge area for rest and recuperation and to await their much needed drafts of new men. They remained there until the end of November.
Back to the top of the page.

Major T Murray DSO later in the war.
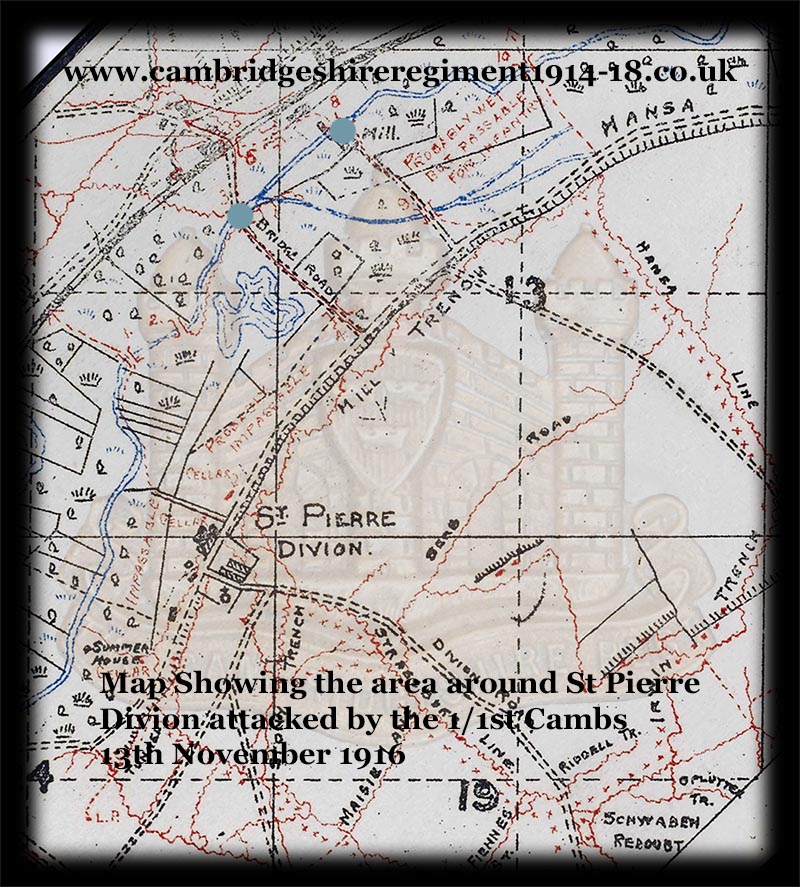
Map showing the area around St Pierre Divion, including the Mill and Bridge objectives marked in blue (click for bigger image).
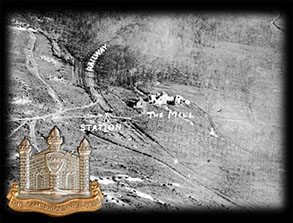
The Mill captured by the Cambs.
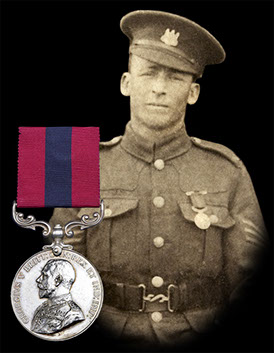
Sgt Bert Death after the presentation of his DCM, awarded for his actions at the bridge.
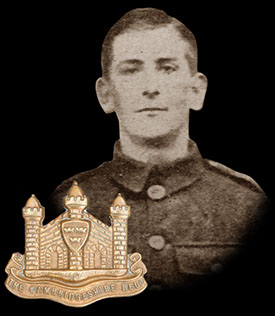
William Blatch from Cambridge, killed during the fighting at St Pierre Divion.

This site went live on the 14th February 2015 to mark 100 years since the 1/1st Cambs went off to war.
WE WILL REMEMBER THEM
Email us: cambsregt@gmail.com
Copyright 2015, 2016, 2017, 2018, 2019 by Felix Jackson. The information and images on this site should not be reproduced without prior permission.